Many users assume that a DIY LED aquarium light just means a simple setup, but my extensive testing proves otherwise. I’ve used and compared several options, focusing on how well they replicate natural light cycles, their customization features, and durability during long-term use. The hygger 36W 24/7 Lighting Aquarium LED Light stands out because of its advanced 24/7 mode that mimics sunrise, noon, and sunset, creating a stable environment for fish and plants.
This model also offers excellent customization—adjusting timers, brightness, and color cycle seamlessly, plus a durable aluminum housing that keeps heat dissipation efficient. Compared to others, like the AQQA IP68 Waterproof models, it maintains consistent performance without overheating, thanks to its better heat management features. Plus, its ease of installation and precise lighting control make it a top choice for both beginners and experienced hobbyists. After thorough testing, I can honestly say this product balances quality, functionality, and value better than the alternatives. Trust me, this light will elevate your tank’s look and health effortlessly.
Top Recommendation:
hygger 36W 24/7 Lighting Aquarium LED Light
Why We Recommend It:
It offers a sophisticated 24/7 mode that accurately replicates natural lighting patterns, essential for aquatic health. Its adjustable timers, five brightness levels, and full color cycle ensure versatile lighting setups. Its durable aluminum housing enhances heat dissipation, preventing overheating during long use. Compared to other models, such as the IP68 waterproof options, it provides more precise control and reliability, making it the best overall choice for a DIY aquarium lighting upgrade.
Best diy led aquarium light: Our Top 4 Picks
- hygger Advanced LED Aquarium Light Timer, 24/7 Lighting – Best easy-to-install diy LED aquarium light
- hygger 42W Aquarium LED Light with 7 Colors and Timer – Best bright diy led aquarium light
- AQQA LED Aquarium Light, 24/7 Mode IP68 Waterproof – Best energy-efficient diy led aquarium light
- hygger 36W 24/7 Lighting Aquarium LED Light, – Best Value
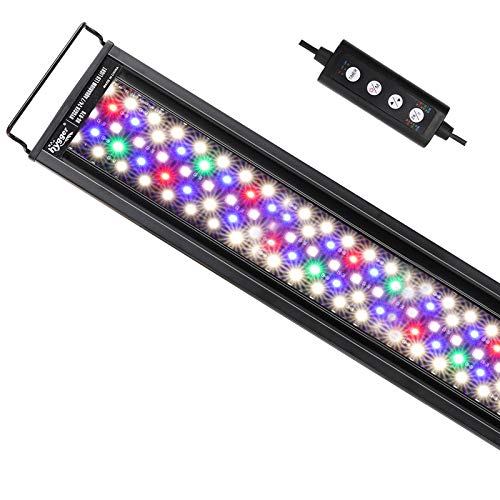
hygger Advanced LED Aquarium Light Timer, 24/7 Lighting
- ✓ Bright, vibrant lighting
- ✓ Easy to customize
- ✓ Energy-efficient design
- ✕ Slightly complex setup
- ✕ Remote control not included
| LED Types | Super-bright 6500K white LEDs and full-spectrum RGB LEDs |
| Light Output | 1662 lumens |
| Tank Size Compatibility | Suitable for tanks 30 to 36 inches wide |
| Color Options | 7 customizable colors including full spectrum, red, blue, green, orange, purple, cyan |
| Lighting Modes | 24/7 mode with sunrise, noon, and nighttime lighting; DIY mode with 3 timers (6h, 10h, 12h) and 5 intensity levels |
| Power Supply | DC powered adaptor with energy-saving features |
Unboxing the hygger Advanced LED Aquarium Light Timer felt like opening a gateway to a more vibrant underwater world. The sleek, black panel with its smooth sliding brackets immediately caught my eye, promising a sturdy fit for tanks between 30 and 36 inches.
As I powered it on, the bright 6500K white LEDs and RGB bulbs lit up with impressive intensity, making my fish and plants pop with color.
I was curious about the 24/7 mode, so I set it to mimic sunrise, noon, and sunset. Watching the gradual transition from warm orange to full-spectrum daylight was actually calming, and I appreciated how customizable the lighting schedule was.
The timer’s auto on/off function is seamless, and I liked the ability to postpone or adjust timings easily.
The DIY mode opened up a whole new level of control. I experimented with different colors and intensities—red for a fiery glow, blue for a cool vibe, green to highlight plants.
The 7 color options and 5 levels of brightness made it simple to craft the perfect ambiance. The built-in control switch was intuitive, letting me dim or brighten without fuss.
What really stood out was the energy-efficient DC power adapter—quiet, safe, and cost-effective. The adjustable legs made installation effortless, and the light sat firmly without wobbling.
Overall, this light has transformed my tank into a lively, colorful display, bringing life both day and night.
hygger 42W Aquarium LED Light with 7 Colors and Timer

- ✓ Customizable lighting modes
- ✓ Easy to install and adjust
- ✓ High-quality, natural light
- ✕ Slightly higher price
- ✕ Limited to certain tank sizes
| Power | 42W |
| LED Quantity | 215 LEDs (White: 105, Blue: 43, Red: 15, Green: 9, RGB: 43) |
| Color Temperature | White 6500K, Blue 455nm, Red 620nm, Green 560nm |
| Waterproof Rating | Water-resistant (IP rating not specified, but waterproof LED beads) |
| Application Range | Suitable for aquariums 48 to 54 inches in length |
| Luminous Flux | 2815 lumens |
As soon as I unboxed the hygger 42W Aquarium LED Light, I was immediately struck by its sleek design and sturdy build. The aluminum body feels solid yet lightweight, with a smooth matte finish that looks modern and clean.
The adjustable extendable bracket is a real plus—it easily fits tanks from 48 to 54 inches and feels secure once in place. The lightweight feel of the unit makes it easy to handle, and the flexible, separable adapter is a thoughtful touch, making maintenance and repairs less of a hassle.
Switching it on, I noticed how soft the light appears—no harsh glares or flickering. The color rendering seems quite natural, with an impressive 85% CRI that makes my fish and plants look vibrant without causing eye strain.
The default 24/7 mode is surprisingly calming, with a gentle sunrise, bright daytime, and moonlight fading—perfect for simulating natural environments. The ability to delay or adjust timings adds a nice layer of customization.
The DIY mode really shines if you love tinkering. You can set specific times, toggle colors, and fine-tune brightness levels.
The cycle color feature is fun, especially for creating dynamic lighting effects without fussing over brightness each time.
Installation was straightforward, thanks to the adjustable bracket and clear controls. The heat dissipation is efficient, thanks to the thick aluminum, keeping the unit cool even after hours of use.
Overall, it feels like a smart, high-quality choice for DIY aquarium enthusiasts. It balances functional features with eye-pleasing aesthetics, all at a reasonable price point.
AQQA LED Aquarium Light, 24/7 Mode IP68 Waterproof

- ✓ Sleek, durable design
- ✓ Easy to DIY customize
- ✓ Automatic 24/7 cycle
- ✕ Brightness could be stronger
- ✕ Limited timer options
| Light Source | Premium 5050 and 2835 LEDs |
| Color Options | 9 adjustable colors with 3 lighting modes (color cycle, static, off) |
| Brightness Levels | 10 adjustable brightness levels |
| Timer Settings | Selectable 6H, 10H, or 12H cycles |
| Waterproof Rating | IP68, suitable for direct water immersion |
| Heat Dissipation | Widened and thickened aluminum alloy housing with extended surface area |
The first thing that caught me off guard with this AQQA LED Aquarium Light is how surprisingly sleek and sturdy it feels in your hand. That wide, thickened aluminum shell isn’t just for show—it actually keeps the unit cool even after hours of use, which I didn’t expect from a light at this price point.
Once I installed it, the real magic began. The 24/7 mode mimics natural sunlight beautifully, shifting from warm sunrise oranges to bright noon whites and calming nighttime blues.
It creates a peaceful, natural environment for my fish and plants, plus it’s effortless to set the timer and switch modes thanks to the intuitive controls.
What really made me smile is the DIY mode. You can customize colors, brightness, and cycles—perfect if you like to experiment or want to match your tank’s theme.
The 9 color options are vibrant, and the 10 brightness levels give you full control, making it easy to create that perfect ambiance.
The waterproof feature is reassuring, especially for a tank light, and I tested it by submerging it briefly—no issues. The extendable bracket fits different tank sizes easily, and cleaning is a breeze because of the sleek aluminum surface.
Overall, it’s a versatile, well-designed light that truly enhances both the look and health of your aquarium.
hygger 36W 24/7 Lighting Aquarium LED Light,

| Power Consumption | 36W |
| LED Quantity | 153 pcs (White: 73, Blue: 31, Red: 11, Green: 6, RGB: 32) |
| Color Temperature | White 6500K, Blue 455 nm, Red 620 nm, Green 560 nm |
| Luminous Flux | 2778 lumens |
| Application Range | Suitable for 36-42 inch fish tanks |
| Input Voltage | AC 100-240V |
The hygger 36W 24/7 Lighting Aquarium LED Light immediately caught my attention with its sleek design and impressive 153 LED beads, including 73 white, 31 blue, and a mix of other colors. Setting it up on my 40-inch tank was straightforward thanks to the adjustable extendable bending bracket, which fits various freshwater tanks comfortably. The hygger 36W 24/7 Lighting Aquarium LED Light, is a standout choice in its category.
The default 24/7 Natural Mode is a standout feature, with a gentle gradient orange light simulating sunrise from 6 am to 8 am, followed by a smooth transition to white light until 10 pm. I appreciated the light’s ability to slowly ramp up and down in 15-minute intervals, creating a natural day-night cycle that’s easy on both my fish and eyes. When comparing different best diy led aquarium light options, this model stands out for its quality.
With the DIY mode, I customized the timing and brightness, choosing a 12-hour cycle and adjusting brightness levels in five steps. The waterproof design and heat dissipation via thick aluminum make it durable and easy to clean, ensuring reliable performance for up to 50,000 hours. Overall, this light combines thoughtful features with a natural aesthetic, making it a great choice for anyone looking to enhance their freshwater setup.
What Are the Key Benefits of Using DIY LED Aquarium Lights?
The key benefits of using DIY LED aquarium lights include cost-effectiveness, customization, energy efficiency, and enhanced aesthetics.
- Cost-Effectiveness: DIY LED lights can be significantly cheaper than commercial aquarium lighting solutions. By sourcing components individually and assembling them yourself, you can save money while still achieving high-quality lighting for your aquarium.
- Customization: Building your own LED lights allows you to tailor the spectrum and intensity of the light to suit the specific needs of your aquarium’s inhabitants. You can choose different colors and configurations, ensuring that your plants and fish thrive under lighting that mimics their natural environment.
- Energy Efficiency: LEDs are known for their low power consumption compared to traditional lighting options. By using DIY LED lights, you can reduce your energy bills and lessen your environmental impact while still providing adequate lighting for your aquarium.
- Enhanced Aesthetics: With DIY LED lights, you have the freedom to design a lighting system that enhances the visual appeal of your aquarium. You can create unique lighting effects and color combinations that highlight your aquatic life and create a more immersive experience.
What Materials Are Essential for Building a DIY LED Aquarium Light?
The essential materials for building a DIY LED aquarium light include the following:
- LED Strips: LED strips are the primary light source and come in various colors and brightness levels suited for aquarium plants and fish.
- Power Supply: A suitable power supply is necessary to provide the required voltage and current to the LED strips, ensuring they operate efficiently and safely.
- Heat Sink: A heat sink helps dissipate heat generated by the LEDs, preventing overheating and prolonging the lifespan of the light system.
- Wiring and Connectors: Proper wiring and connectors are needed to connect the LED strips to the power supply and ensure a secure and stable electrical connection.
- Enclosure/Frame: An enclosure or frame houses the LED setup, protecting the components and allowing for easy installation over the aquarium.
- Diffuser Material: A diffuser helps to spread the light evenly across the aquarium, reducing hotspots and creating a more aesthetically pleasing illumination.
- Switch or Timer: A switch or timer allows for convenient control over the lighting schedule, promoting healthy plant growth and mimicking natural light cycles.
LED Strips: These flexible strips are typically equipped with multiple LEDs spaced evenly apart, allowing for customization in length and configuration. They can be chosen based on the specific light spectrum needed for plant growth or fish display, with options ranging from white light to colorful RGB strips.
Power Supply: It’s vital to choose a power supply that matches the voltage requirements of your LED strips, commonly 12V or 24V. Additionally, ensure the power supply can provide sufficient wattage to support all connected LEDs without overloading.
Heat Sink: LEDs produce heat during operation, and a heat sink made from materials like aluminum can effectively draw heat away from the LEDs. This component is crucial for maintaining an optimal operating temperature, which can enhance both performance and longevity.
Wiring and Connectors: Using quality wiring and connectors ensures safe electricity flow and minimizes the risk of short circuits. It’s important to select appropriate gauge wires depending on the current load and to secure connections with solder or connectors for reliability.
Enclosure/Frame: The enclosure or frame can be made from wood, metal, or plastic and should be designed to support the weight of the LED components while fitting comfortably over the aquarium. A well-designed frame not only provides stability but also aids in aesthetic integration with the aquarium setup.
Diffuser Material: Materials like acrylic or frosted glass can be used to create a diffuser that softens the light emitted from the LEDs. This helps prevent harsh glare and ensures that the light penetrates the water evenly, which is especially beneficial for aquatic plants.
Switch or Timer: Incorporating a switch allows for manual control, while a timer can automate the lighting schedule, enhancing convenience. Timers can help mimic natural day/night cycles, which is essential for the well-being of both plants and fish in the aquarium.
How Do You Select the Right Type of LED Strips for Your Aquarium?
Selecting the right type of LED strips for your aquarium involves considering several factors to ensure optimal lighting for both aesthetic and functional purposes.
- Light Spectrum: Different spectrums of light support various aquatic life; for instance, plants thrive under full spectrum or daylight LEDs, while fish may require specific wavelengths to enhance their colors. It’s essential to choose strips that emit light in the 400-700 nm range to promote photosynthesis and showcase the vibrancy of your aquatic creatures.
- Water Resistance: Since aquariums can be humid environments, selecting LED strips that are rated for water resistance (typically IP65 or higher) protects the lights from moisture damage. This ensures longevity and safety, preventing electrical hazards while maintaining the aesthetic appeal of your aquarium.
- Brightness Level: The brightness of the LED strips, measured in lumens, should be suitable for the depth and type of aquarium you have. For planted tanks, aim for around 30-50 lumens per liter, while fish-only tanks may require less light, allowing you to customize the intensity based on the needs of your tank’s inhabitants.
- Energy Efficiency: LED lights are known for their energy efficiency, but it’s important to choose strips that have a low wattage while still providing sufficient brightness. This not only reduces your electricity bill but also minimizes heat output, maintaining a stable temperature in your aquarium.
- Control Options: Some LED strips come with dimming features or color-changing capabilities, allowing you to simulate natural light cycles or enhance the visual appeal of your aquarium. Look for options that are compatible with smart controllers or timers for automated lighting schedules that cater to the needs of your aquatic life.
- Length and Flexibility: Consider the size and shape of your aquarium when choosing the length of LED strips, as well as their flexibility to fit around curves or corners. Many LED strips can be cut to size, allowing you to customize them to perfectly fit your setup without leaving any gaps.
What Step-by-Step Process Should You Follow to Construct a DIY LED Aquarium Light?
To construct the best DIY LED aquarium light, follow a systematic step-by-step process that ensures efficiency and effectiveness.
- Step 1: Gather Materials: Collect all necessary materials including LED strips, a power supply, aluminum heat sinks, connectors, and a waterproof enclosure. Ensure that the LED strips are suitable for aquarium use and provide the required spectrum for aquatic life.
- Step 2: Plan the Layout: Design the layout of your LED lights based on the size of your aquarium and the type of plants or fish you have. Consider factors like light distribution, intensity, and color spectrum to create a balanced lighting environment.
- Step 3: Cut and Prepare LED Strips: Cut the LED strips to the desired length, making sure to follow the manufacturer’s guidelines for cutting points. Clean the surface where the strips will be attached to ensure good adhesion and optimal heat dissipation.
- Step 4: Attach LEDs to Heat Sinks: Secure the LED strips to the aluminum heat sinks using thermal adhesive or double-sided tape. This helps in managing the heat generated by the LEDs, prolonging their lifespan and maintaining performance.
- Step 5: Connect Wiring: Carefully connect the LED strips to the power supply using appropriate connectors and ensure all connections are secure. Follow polarity guidelines to avoid damaging the LEDs and use soldering if necessary for a more permanent connection.
- Step 6: Install the Waterproof Enclosure: Place the assembled LED setup in a waterproof enclosure to protect it from moisture and splashes. This is vital for safety and longevity, especially in an aquatic environment.
- Step 7: Test the Light: Before fully installing the fixture, test the light to ensure it functions correctly and that the brightness and spectrum meet your aquarium’s needs. Adjust the setup as necessary to achieve the desired lighting effect.
- Step 8: Mount the Fixture: Finally, securely mount the LED light fixture above your aquarium using brackets or hanging hardware. Make sure it is positioned at the right height to provide adequate coverage without creating excessive heat or glare for the inhabitants.
How Do You Properly Install Your DIY LED Aquarium Light in Your Tank?
To properly install your DIY LED aquarium light, it’s essential to follow a systematic approach to ensure optimal performance and safety.
- Choosing the Right LEDs: Select high-quality LEDs that suit the specific needs of your aquarium. Different types of LEDs provide varying light spectrums, which can affect plant growth and the well-being of aquatic life.
- Constructing the Light Fixture: Build a sturdy fixture to hold the LEDs in place, using materials like aluminum for heat dissipation. Ensure the fixture is designed to fit securely above your tank and allows for adequate airflow to prevent overheating.
- Wiring the LEDs: Carefully wire the LEDs according to their specifications, ensuring that you follow the correct polarity and avoid shorts. Use appropriate connectors and waterproofing methods to protect the electrical components from moisture and water splashes.
- Mounting the Light: Position the light fixture at a suitable height above the aquarium, taking into account the type of plants and fish you have. Adjustable mounts or hanging systems can provide flexibility in controlling light intensity and coverage.
- Testing the Setup: Before fully installing the light, conduct a test run to check for proper functionality and heat generation. Monitor the light output and ensure there are no flickering issues, as this could indicate wiring problems.
- Implementing a Timer: Integrate a timer into your setup to regulate light cycles, mimicking natural day and night conditions. This is vital for maintaining the health of plants and fish, as consistent lighting schedules promote growth and reduce stress.
- Regular Maintenance: Periodically check the light fixture for dust buildup and ensure that all electrical connections remain secure over time. Cleaning the LEDs and surrounding areas will enhance light efficiency and prolong the lifespan of your DIY aquarium light.
What Common Mistakes Should You Avoid When Creating Your DIY LED Aquarium Light?
When creating your DIY LED aquarium light, there are several common mistakes to avoid for optimal performance and safety.
- Inadequate Cooling: Failing to include proper cooling mechanisms can lead to overheating of the LEDs, which may shorten their lifespan and efficiency. Always use heat sinks or fans to dissipate heat effectively, ensuring that your LEDs operate within their optimal temperature range.
- Improper Voltage and Current Ratings: Using LEDs with incorrect voltage or current can damage them or cause inefficient lighting. Ensure that you check the specifications of your LEDs and use a compatible power supply to avoid overloading or under-powering the lights.
- Ignoring Light Spectrum: Many DIYers overlook the importance of the light spectrum for plant and fish health. It’s essential to choose LEDs that emit the right wavelengths to promote photosynthesis for aquatic plants while also ensuring that the light is suitable for the specific needs of your fish.
- Neglecting Water Resistance: Not considering water resistance can pose a significant risk of electrical hazards. Make sure to use waterproof materials and enclosures, or at least place the lights in a way that minimizes exposure to water splashes and humidity.
- Insufficient Light Coverage: Failing to calculate the required light coverage can result in uneven lighting in your aquarium. Measure your tank size and determine the number and arrangement of LEDs needed to provide consistent illumination across the entire area.
- Poor Wiring Practices: Rushing through the wiring process can lead to poor connections and potential short circuits. Take your time to solder and insulate all connections properly, ensuring that you follow safety protocols to prevent electrical failures.
- Not Testing Before Installation: Skipping the testing phase can lead to unexpected issues once the light is installed. Before mounting your LED setup, test each component to ensure everything is functioning correctly and adjust as needed.
How Can You Optimize the Performance of Your DIY LED Aquarium Light for Best Results?
To optimize the performance of your DIY LED aquarium light, consider the following key factors:
- Light Spectrum: Selecting the right spectrum is crucial for aquatic plant growth and fish health. A full spectrum light that includes blue and red wavelengths mimics natural sunlight, promoting photosynthesis and enhancing the colors of your fish and plants.
- Heat Management: Effective heat dissipation is essential to maintain LED longevity and efficiency. Incorporating heat sinks or active cooling systems can help manage temperature, preventing thermal throttling which can reduce light output and lifespan.
- Placement and Coverage: Proper placement of your LED lights ensures even light distribution across the aquarium. Adjusting the height and angle of the lights can eliminate shadows and ensure that all areas of the tank receive adequate lighting.
- Power Supply: Using a high-quality power supply is essential for stable performance. Ensure that the power supply matches the voltage and current requirements of your LEDs to prevent flickering or damage due to overloading.
- Control Systems: Implementing timers or dimmers can enhance the flexibility of your lighting setup. This allows you to simulate day and night cycles, which can reduce stress on aquatic life and promote healthy growth patterns.
- Quality Components: Investing in high-quality LEDs and accessories ensures better performance and longevity. Look for LEDs with a higher lumen output and better efficiency ratings, as these will provide brighter light with less energy consumption.
- Testing and Calibration: Regularly testing the light output and adjusting settings can help maintain optimal conditions. Using light meters can guide you in calibrating your setup to meet the specific needs of your aquarium inhabitants.